Shop Infrastructure Update: Part I
My Journey
I started out in the early 90s working out of a little wooden box which held my tools and rings for making chain. Then, I grew into a tackle box for awhile. Ultimately, I got a portable bench that I quickly replaced with a more portable, portable bench. These little benches worked fine for festivals and the like, but they never really served my needs in the various home shops I had. Back in Athens, I got a Craftsman tool chest that I used as a bench and it came with me to Milledgeville. Unfortunately, it do not survive the move out of my old house.
When I moved to Woodstock, I was making do with what I had, and to be honest, I had very little time for art.
When I moved to Tucker, I started to work in the shop again. I set up the two portable benches I still had. I mostly used this shop space to make beads. I just had too much going on with my life at that time and silver work just was not being done.
I built a jeweler’s bench around the less portable of my portable benches. This provided lots of bead storage, but as my tools grew, I ran out of room. The other issue with this bench was that once I started using a piercing saw I discovered the bench pin was too low to the ground. I just did not give jewelry assembly the same level of thought I gave glass work when I originally thought about how to set the new shop up in Stone Mountain.


I tried to deal with the tools storage issue by trying to better utilize my existing benches and tool chest. However, I could not solve the desk height issue. I came to the conclusion that I needed a jeweler’s bench which tend to be higher. I also came to feel that the 4 foot wide work table really was too deep and too long for what I needed in the metal work area. While I could mount a lot to the bench, I was not using the 2 feet of space near the walls and most of the mounted tools were not used that often. I did add some hammer storage under the jeweler’s bench I had previously made.


I started looking for a jeweler’s bench and quickly ruled out a new top of the line bench which are around $2300.00. Even a used bench that is mid grade sells for between $500 to $800 and offer nowhere near the space I wanted. A search on Pinterest led me to the idea of a desk conversion and the best candidate I could come up with was a roll top desk. My partner, who has gotten really good at estate sale shopping, found me one to build a bench out of for a really good price.

Before the desk could be moved in, we raised the power supply by 13 inches to accommodate the height of the completed desk with room to spare. This part the job went much faster than I thought it would, impart, thanks to these push connectors that were used by the contractor who put in my electricity to begin with. These are definitely better than wire nuts.


The roll top was removed at the estate sale so once we moved it into place, we could just go to work. We started by raising the desk off the ground with some 2x4s so that the desk would be off the floor in the event of water spilling. Then, we set the new top made of Poplar ply. I meant for it to be Oak but Home Depot had it in the wrong bin and the Poplar was cut by mistake. The center drawer was removed and the cut out was added. I added a 6 inch straight section to the cut out to accommodate a GRS system in the future.


I wanted to raise the main deck by 8 inches so I started with 2x10s and cut them down 7 1/2 inches with the help of a friend. I felt that 8 inches was a tad higher than I needed. I probably could have gotten away with a 2x8 which would have given me a 7 1/4 inch rise but, oh well.


I did my best to make the cut out to match the mid deck. The final step was to put the Oak boards in to add a proper face to the pine riser boards and to add some gas, air, and electrical pass throughs. Now, the desk just needs to get loaded out.

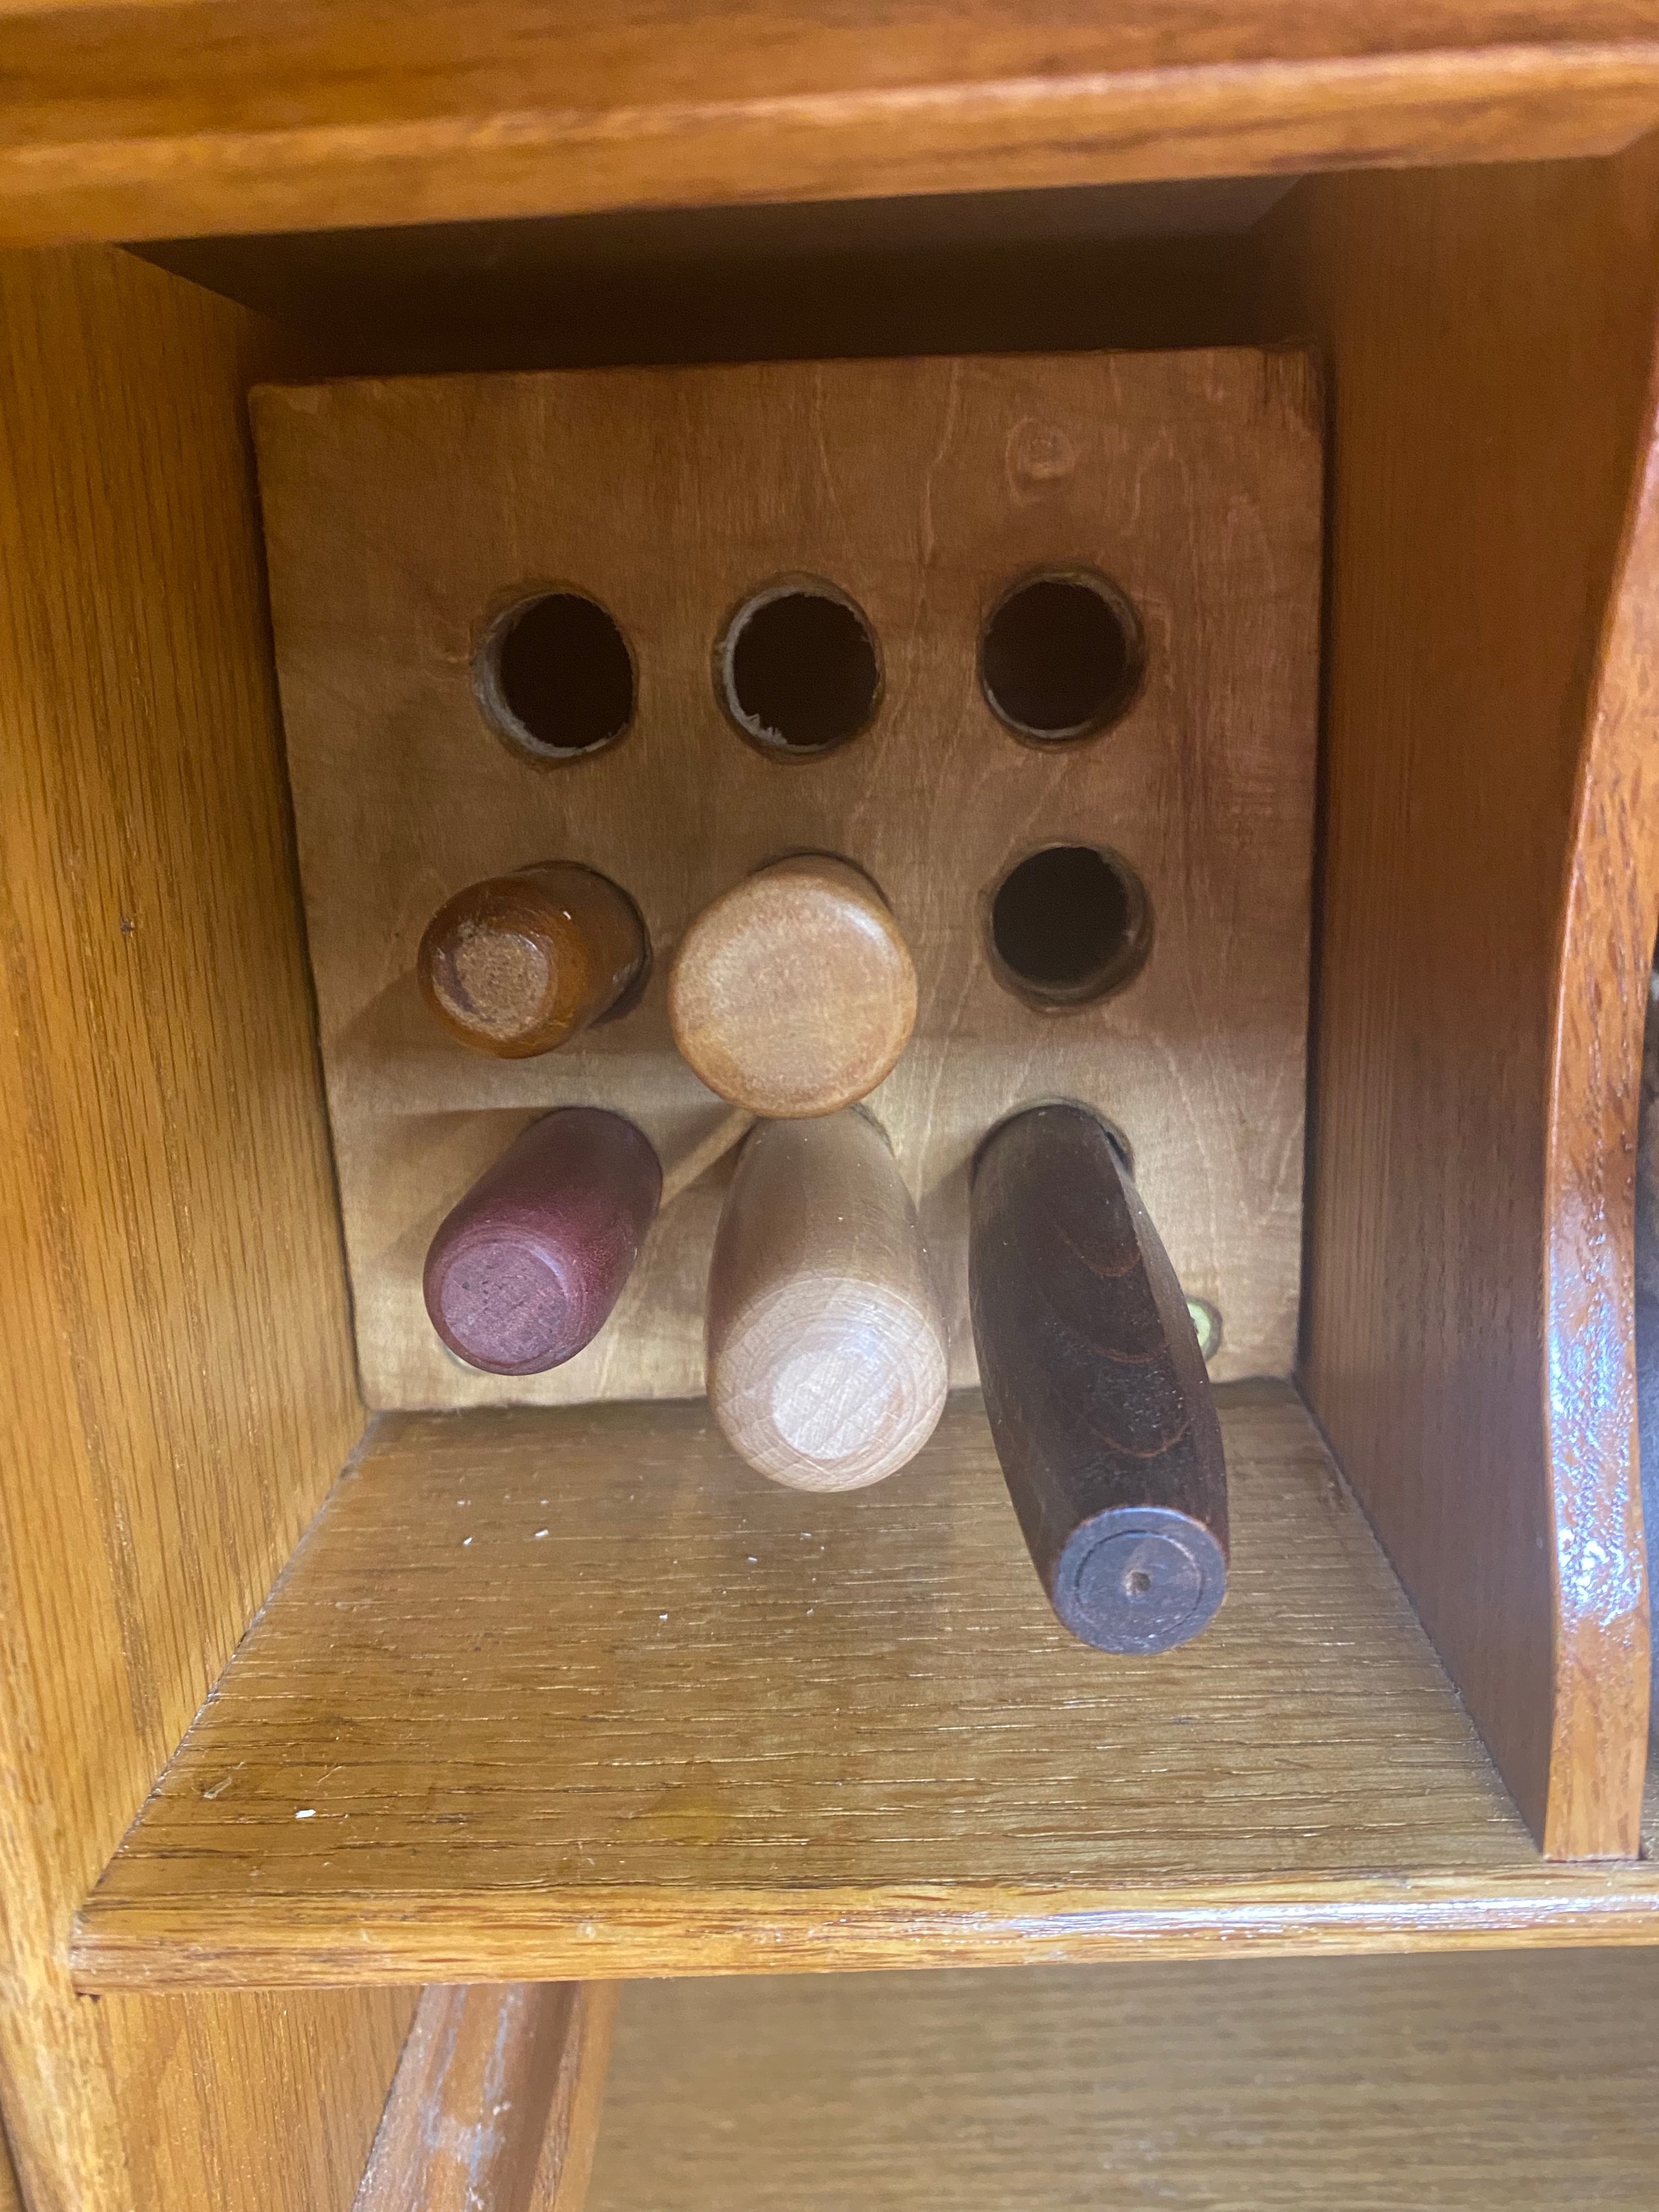
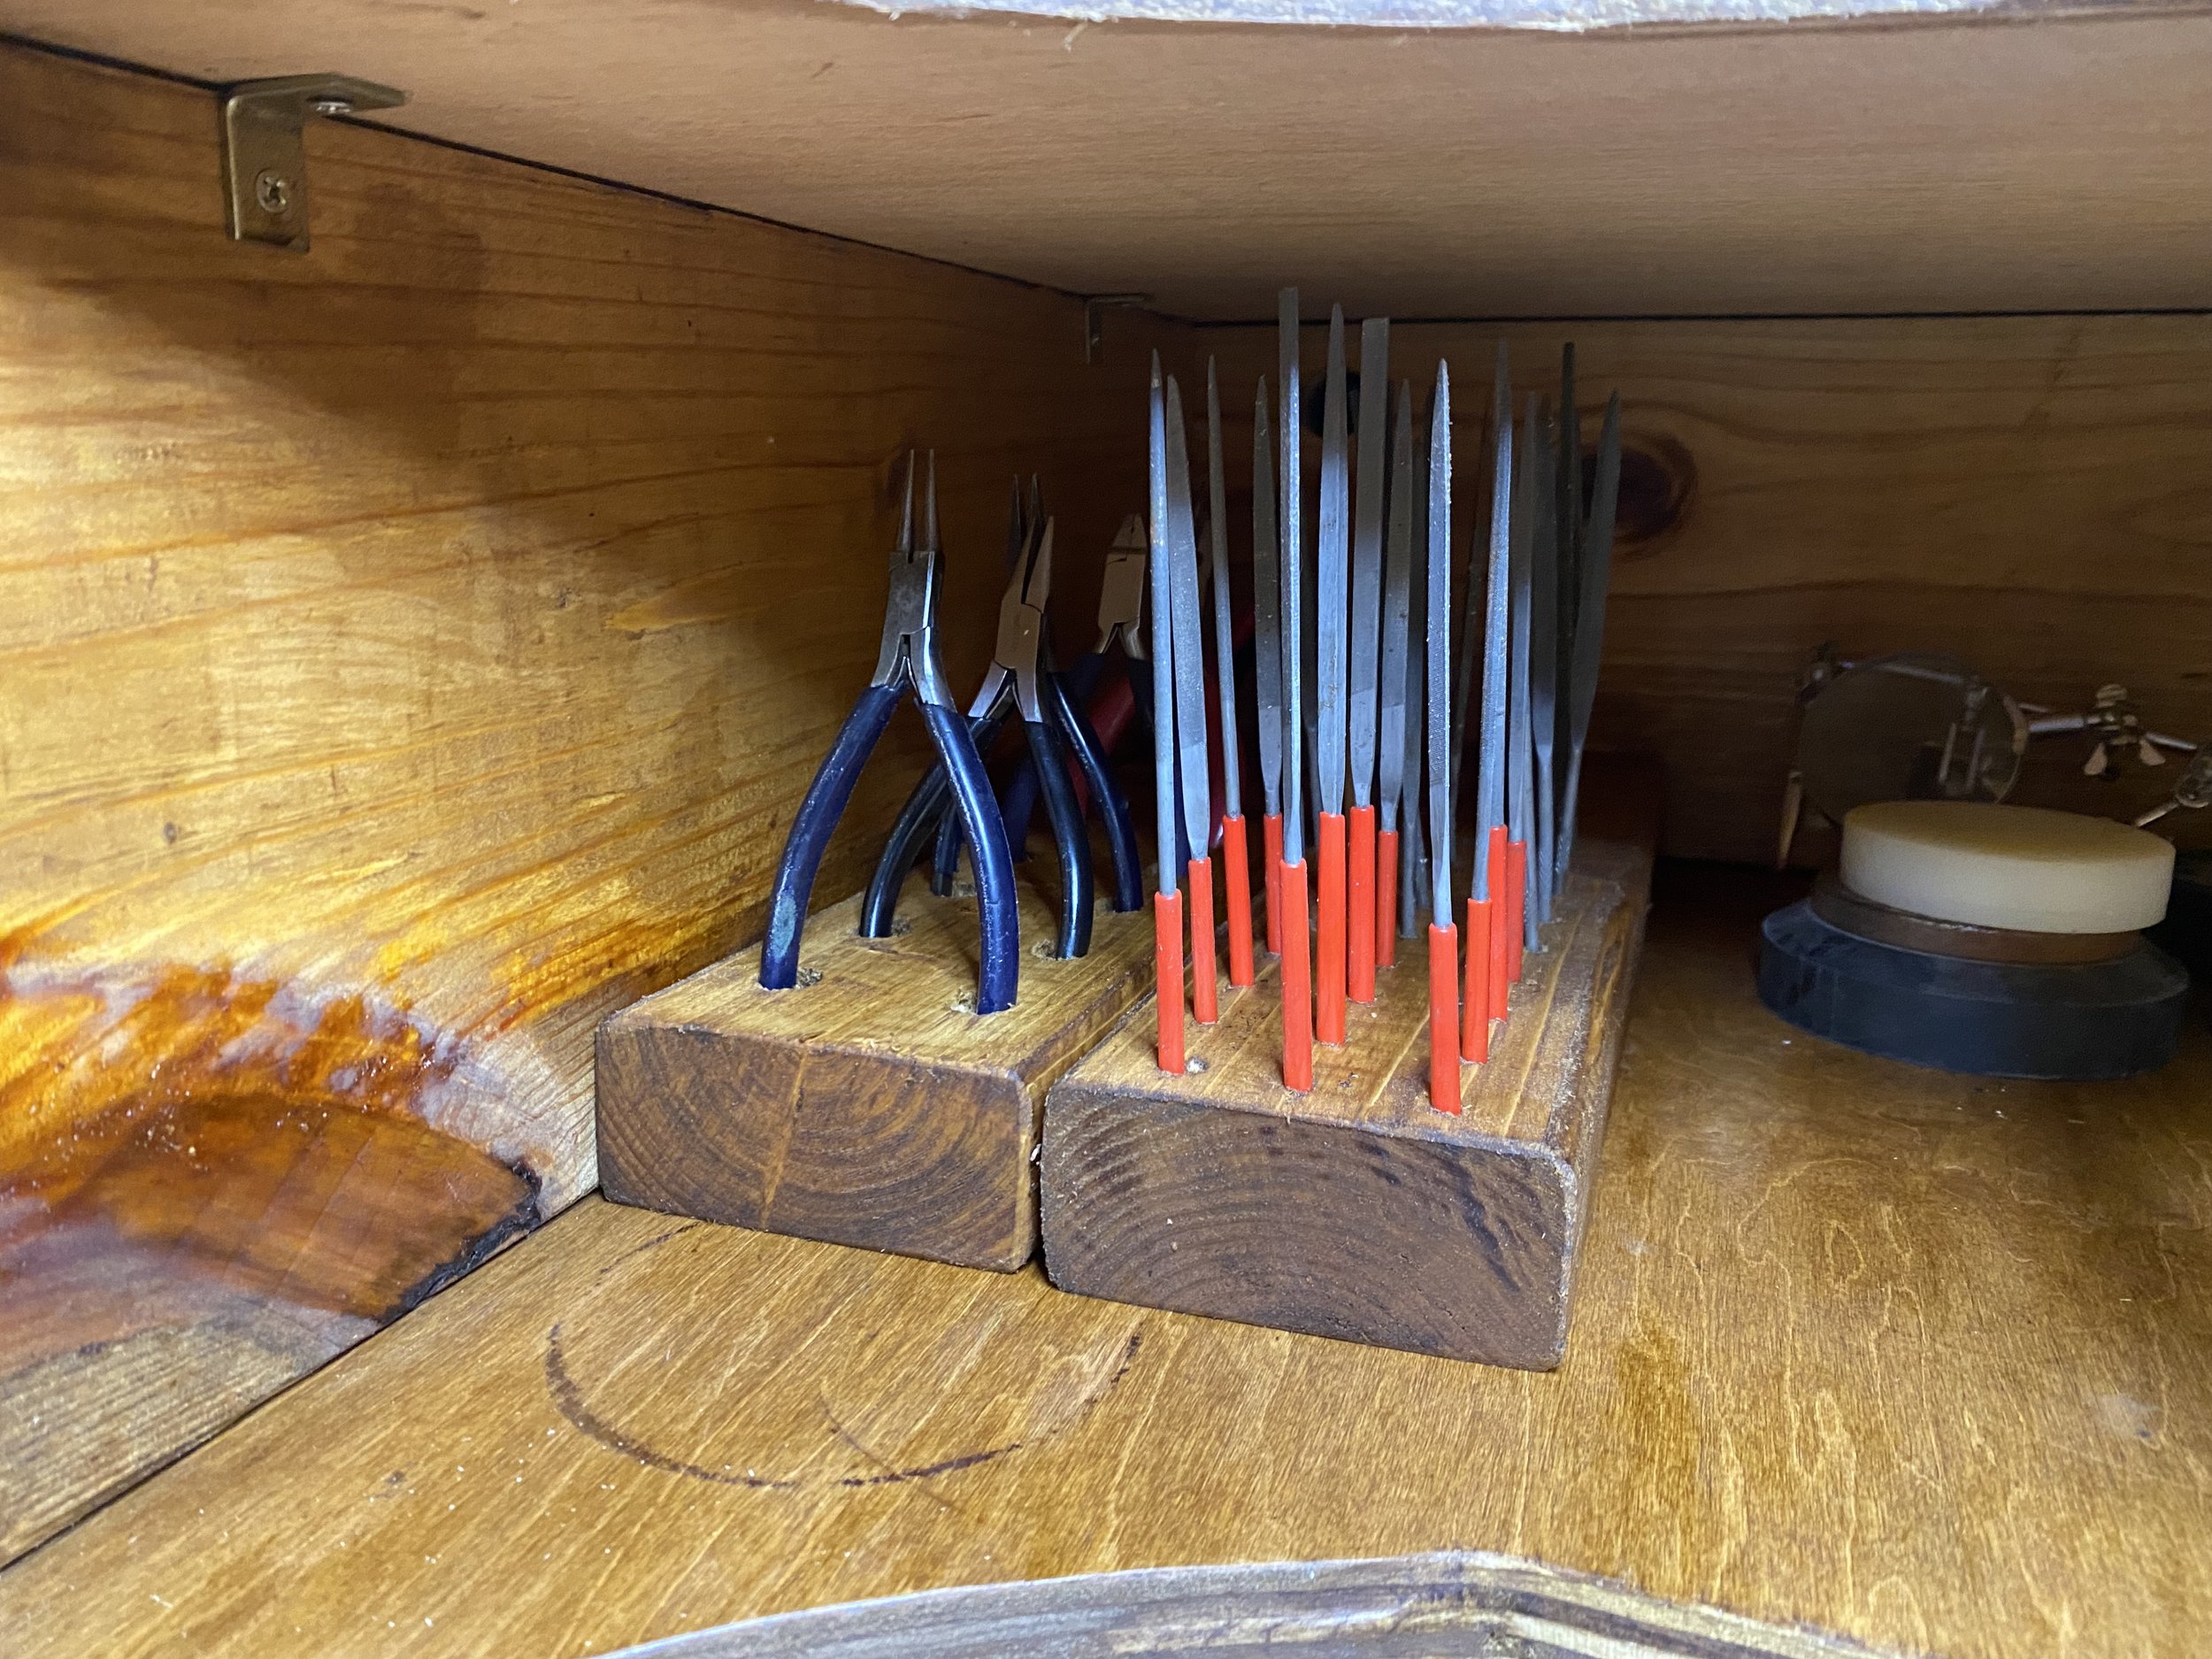
I used some Poplar scraps to make a tool hole to fit into the rooftop cubbies so that my banishing, setting and filing tools have a place to live. I used scrap 2x4s to make holders for pliers, files, and pits.


At the time I wrote the blog, there were still some outstanding things to work out such as a hanger for the rotary tools and a bench pin.
The story of this redesign and improvements to the shop will be continued.